Monday, December 23, 2013

Homemade Greek-Style Yogurt in Crockpot

Organic Greek-Style Yogurt -- 6 servings for less than $4

I used to buy individual 6-oz containers of organic Greek yogurt ONLY when they went on sale for 99 cents each.  Regularly priced, they were $1.99!  I couldn't justify spending $10 a week on five small containers of yogurt to add to my brown bag lunches.  Worst of all?  I really didn't like the very sour flavor of the only plain organic brand available.  I liked the creamy taste of Fage and Chobani brands, but eating organic dairy is important to me, so I opted to make my own and was surprised at how perfectly delicious it was.  Now I make 4-6 servings of thick, creamy, ORGANIC, low-carb yogurt each week for less than $4.  I'll never buy yogurt again, and neither should you!

Easy Steps (followed by more detailed instructions and photos):

1.  Heat milk to 183 degrees
2.  Pour into crock pot and cool to 115-119 degrees
3.  Add yogurt starter
4.  Place crock pot in cool oven with light on for at least 9, but up to 16 hours
5.  Refrigerate homemade yogurt
6.  Eat yogurt or continue on to one more step to make it Greek-style (thick, creamy, low-carb)

You'll Need:

-1/2 Gallon Organic Milk (I prefer 2%, but have used 1%)

-2 Tablespoons organic yogurt (sweetened is okay, as it is the cultures that you want).  The first time you make yogurt, you'll need to use some purchased brand , but once you've made your own, you just keep two tablespoons aside for your next batch. 

-Crock pot (I've used large, but now prefer small for ease of storing in the refrigerator)

-Medium Saucepan

-Cooking thermometer (battery-operated is a great investment and time saver, but optional)

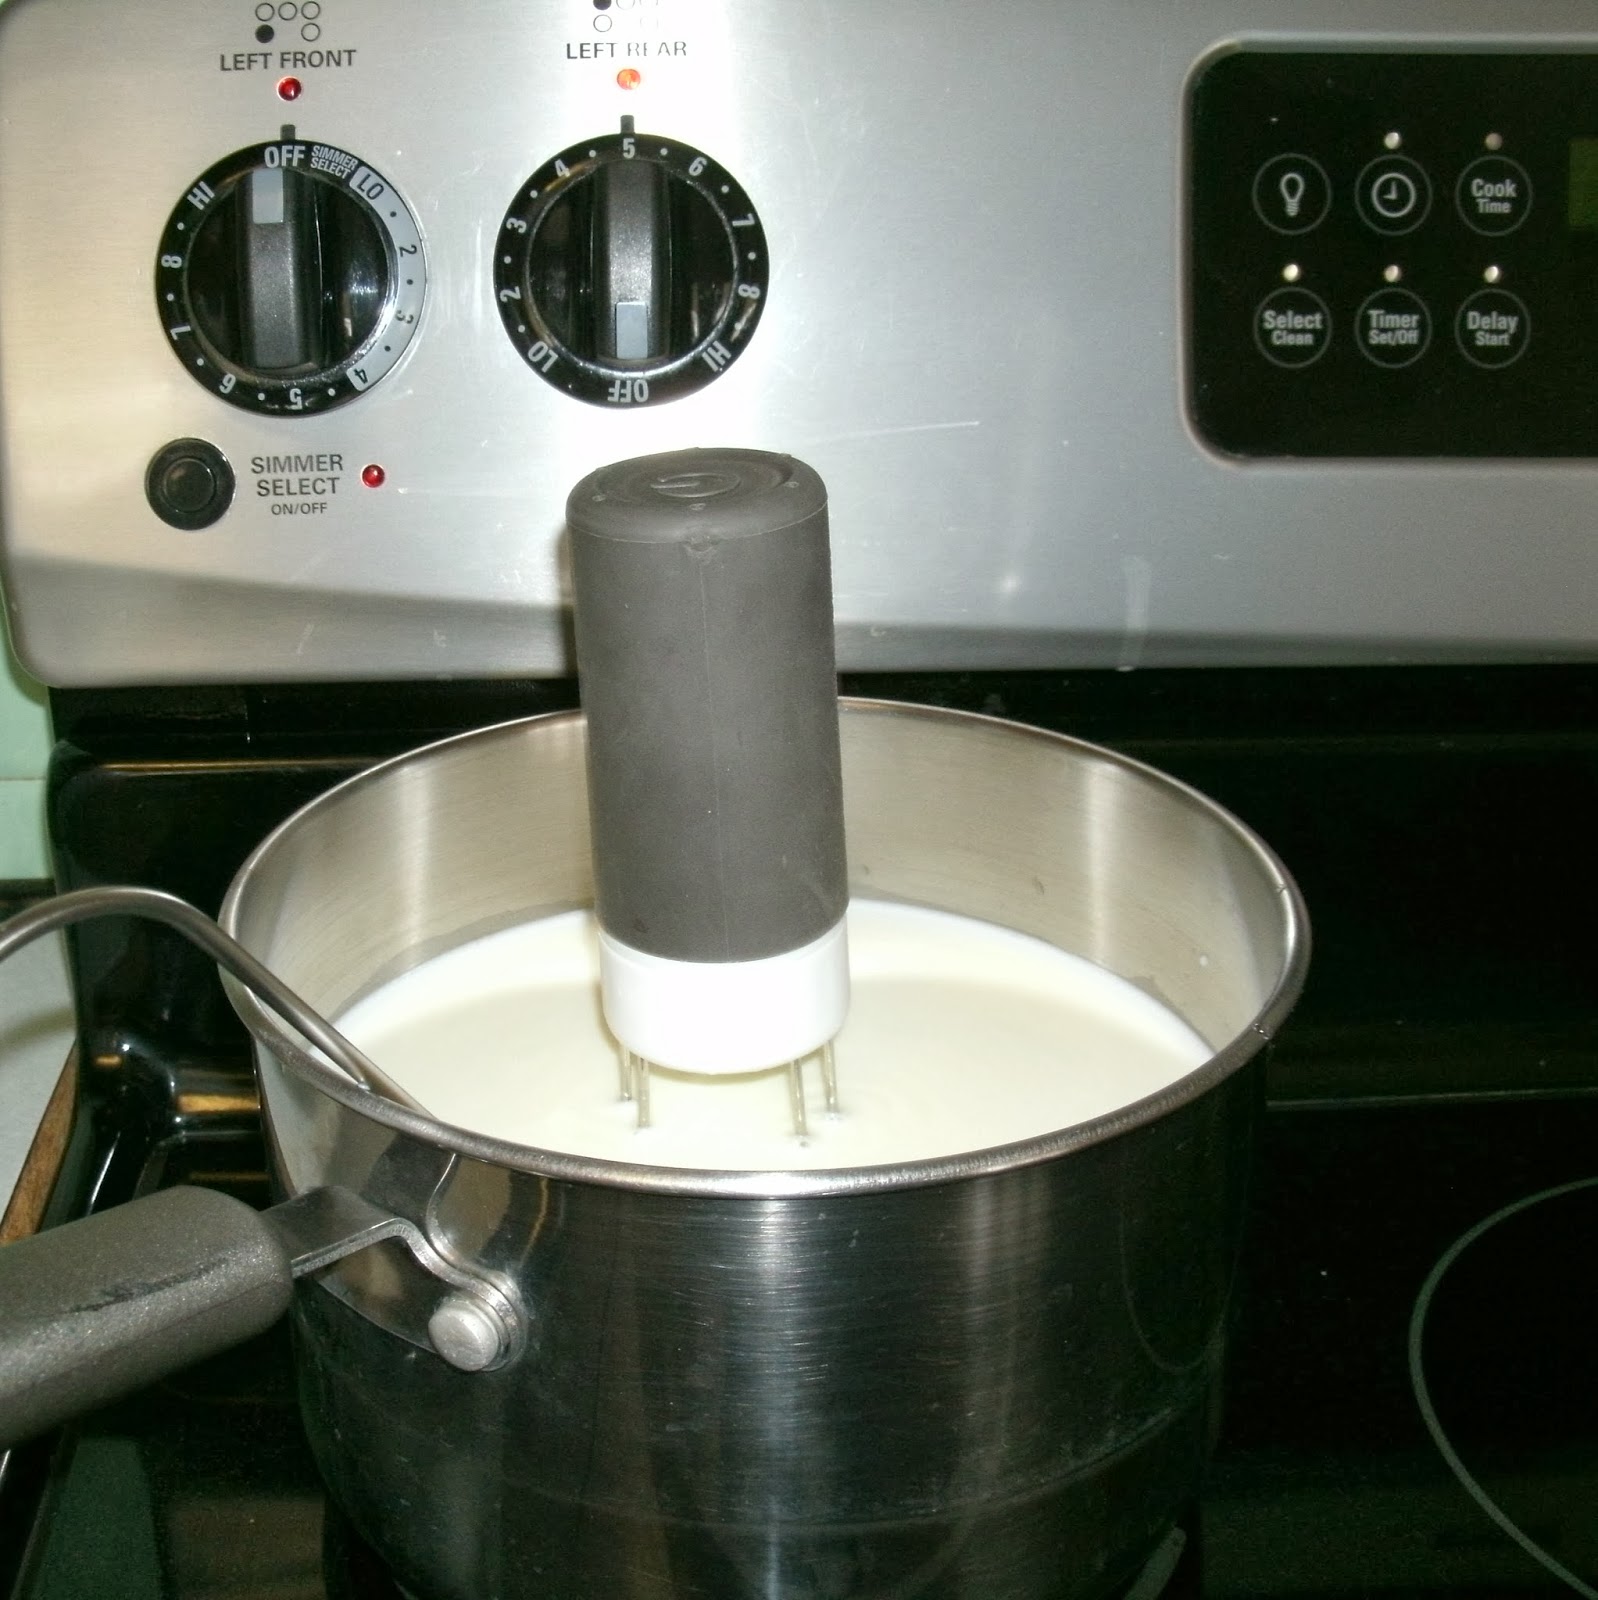
- Large wooden spoon or Robo-stir* or other automatic stirring equipment (optional, but well-worth purchasing):


*Robo-stir continuously stirs your milk, so it will not burn or stick.  Otherwise, you will need to hand stir continuously until milk is heated to correct temperature (183 degrees).   

Note: Robo-stir has not been successful for other recipes or thicker soups/stews, but is perfect for this task and well worth the $8 investment.  It takes four (4) AA batteries.  I use rechargables and sometimes have to borrow them from the TV remote or digital camera on yogurt day!

e
Robostir right out of the pan!

For Greek-Style:

Strainer (fine mesh works best)
Coffee Filter (basket-style)


Detailed Instructions/Photos:

1.  Pour approximately 3/4 of the carton of milk into saucepan over medium heat (electric stove: 5)
2.  Switch on Robo-stir and place in pan (or hand stir continuously to prevent scorching milk)
3.  Using auto-temp alert on thermometer, set to 183 degrees and submerge probe into milk or monitor manual thermometer


Magnetic timer stuck to stove with probe in pan
 
4.  Pour approximately 1/4 cup milk into separate bowl, mix in 2 Tablespoons of yogurt starter, and set aside

5.  When heated milk reaches 183 degrees, remove from heat.  I usually let the Robo-stir continue for a few minutes.
6.  Pour heated milk into crock pot, move to a cooler spot in the kitchen, and put thermometer probe in place to wait for milk to cool to between 119 and 113 degrees.  (I set my kitchen timer in 20 minute increments to make sure I remember to check the dropping temperature before it goes too low.)

Pour hot milk into small crock pot - tuna can for size reference
Add starter when temperature drops to 112 - 115 degrees

7.  When milk reaches approximately 115 degrees, stir in mixture of milk/yogurt starter that you had set aside earlier.

8.  Place ceramic crock pot liner into base, add cover, and place in unheated oven.

9.  Turn on the oven light, which should provide just enough heat to let the yogurt set up overnight.
10.  Place a clean kitchen towel over the top of the crockpot cover to incubate further, and leave undisturbed for at least 9 hours, but up to 16.


11.  Nine (9) to 16 hours later, place the crock pot liner (now full of homemade yogurt) in the refrigerator.

The yogurt is perfectly set
 Note:  I usually make my heated milk mid to late day and put my crock pot in the oven overnight.  When I wake in the morning, I put the crock pot liner in the refrigerator before work.  Once home, I can eat the cold plain yogurt as is (adding flavorings and sweeteners - I use vanilla and stevia, but it is delicious plain) or I can move on to the next step to make it Greek-style by removing the whey and lowering the carb count, while making it thicker and creamier!

Greek-style:

1.  Place fine mesh strainer over a saucepan of similar size.
2.  Line with a basket-style coffee filter
3.  Fill up filter with yogurt


4.  Cover with plate (my choice) or plastic wrap and return to refrigerator


5.  In a few hours, the whey will have drained into the pan, and creamy Greek-style yogurt remains to eat (usually, it will just fall away from the filter lining if you are transferring to a large bowl.  If you are only in need of one serving, you can take a few spoonfuls at a time.

Note:  Because of my refrigerator size, I am limited to the size of my crock pot and saucepan system.  If you have more space, you could try more than a half gallon at a time, but this weekly process works for me and provides 4-6 servings of delicious, Greek-style yogurt for only $3.69 per week!


Sunday, December 22, 2013

Ways to Save on Organics #2 - Treat Ingredients Like Gold


Have you ever been guilty of purchasing ingredients for a specific recipe and then finding yourself throwing out what is left over?

Well, to eat organically for less, you'll need to treat your ingredients like gold and save your leftover portions for future recipes!

For example, today I made cabbage soup.  Two basic soup starters are onions and celery, which aren't terribly expensive even if they are organic.  However, they become even less expensive if you use every little bit.  For example, I cut the large onion in half, whirred it in the food processor, and used half for my soup, put the other half in a freezer baggie and popped in freezer to save for another recipe.

Celery isn't something I use that often and rarely use the whole package.  Rather than putting it back in the refrigerator to get bendy and brown in a few days, I process three stalks at a time in the food processor and portion them into freezer baggies for future soup, stuffing, or other recipes.  I also make a few mini portions to be used as a mix-in for tuna salad sandwiches.  In the dead of winter, fresh celery brightens up bland tuna, and you can mix it in right out of the freezer.  Just wait a little bit to eat the tuna salad, and the flavors are melded perfectly.


Tomato paste is one additional soup flavor enhancer. I usually get four separate freezer servings out of a can, always ready to add to soup or to top a homemade pizza.  Organic paste in can or bottle can be between $2 to $3, but when you break it down into 50-cent portions, organic is very worth it!  Same with celery, only about $3 a bunch, but after making 5 freezer portions, it's downright frugal!

The bonus is that you've put time into making the portions already, so they are ready for the next few recipes -- less mess, time, and money overall.

What other organic ingredients do I portion and freeze?

-Cans of coconut milk -- 4 to 5 servings per can for baking
-Parmeseano Reggiano hard cheese shredded
-Feta cheese in chunks
-Red onion to top pizza -- cut in half, slice and just pop the other half in freezer baggie.  The frozen half will be easier to slice thin to top your next pizza, but will add a little more moisture unless you set it on a paper towel for a bit.
-Pizza or pasta sauce from a jar for pizza toppings - about 4-5 portions packed in glass containers
-bags of shredded organic cheeses when on sale

There's really no limit to what you can portion and save for recipes.  I have a small refrigerator with a basic freezer on top.  The beauty of freezing individual portions is that there's always room to tuck a few things in here and there.

If you spend your hard-earned cash on organic foods, remember to treat it like gold.  Go back to the ways our Depression-era ancestors and use every bit of what you buy to save money and eat well!


Photos from Once a Month Meals, because they are prettier than mine.  I haven't gotten to the point making whole meals for my freezer, but maybe someday!

Monday, December 9, 2013

Ways to Save on Organics #1 - Buy Basics and Buy in Bulk


Organic foods are more expensive than conventional foods, especially if you buy prepackaged, prepared foods and snacks.

The only way to make the change without financial shock is to slowly stock your pantry and refrigerator with the basics to make a few meals from scratch.  One, big shopping trip will set you back financially, so replace items as you run out of the ones you currently have at home.  Also, add one organic pantry item per week to your shopping trip.  Over time, you will be all (or mostly) organic.

Organic pantry items that can be purchased for less in bulk bins at natural/health stores:

Rice
Pasta
Oats
Quinoa and other grains
Pop corn
Dry beans
Nuts

Also stock:

Flours
Sugars
Oils
Molasses, Honey, or other sweeteners
Spices
Shelf-stable containers of soy milk, almond milk, coconut milk for recipes and smoothies
Canned/bottled items:  tomato sauces/pastes, crushed tomatoes, beans, chicken/beef/vegetables stocks


Basics for your refrigerator:

Eggs
Milk
Butter

All these items are the start of home-made meals and desserts and is the way our great-grandmothers used to cook for their families.  Check out library books for recipes made from the pantry or basic foods.  You can not only eat organically, but probably for less money over time with healthy, delicious homemade meals.